Lightroom And Why You Should Be Using It
Adobe Lightroom is one of the go-to photo editing programs for photographers & content creators alike. It offers a comprehensive selection of tools to edit images, including everything from cropping & colour correction to stylised editing & retouching. It can seem a little intimidating at first, particularly in comparison to other photo editors which offer quick filters. However, Lightroom can elevate your photos to the next level and is a powerful tool for branding on social media.
The Basics
Set Up
Lightroom is set up to preserve your original files. Start by importing a folder of images on your computer. When you start editing, these original images aren’t updated in that folder. Rather, Lightroom keeps a separate catalogue with the editing information, and when you export the image at the end, the original remains unedited. This reduces the risk of overriding the original image, which is useful if you have to re-edit the image or need a bigger output size.
To maximise results in Lightroom, it’s best to start with a Raw image file, rather than a Jpeg or another file type. When you shoot a Raw image in-camera, it stores a lot more information than other file formats. This means that there is a lot more information to work with when editing, particularly when fixing the exposure or colours in an image. A common analogy is to compare this to cooking a meal. A Jpeg file is like the finished meal, whereas the Raw file represents all the different ingredients in that meal. Working with the ingredients – the Raw File – provides much more flexibility in what you can create.
Colour Correction & Colour Grading
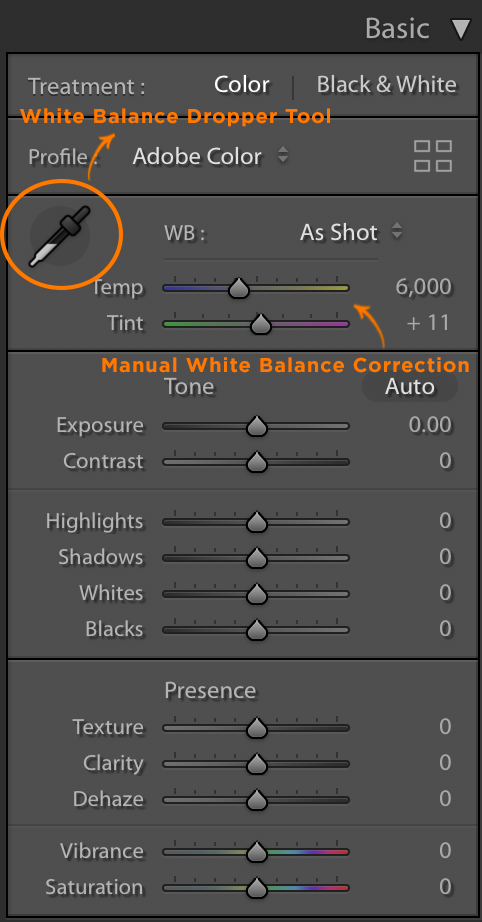
Colour correction is the process of fixing any colour issues, generally in terms of the exposure and white balance. The white balance refers to the tone of an image, which often gets distorted due to camera settings or different lights. Fixing the white balance restores the whites in an image to ensure a clean & natural look. Adjust the white balance by using the temperature sliders. Lightroom can automatically fix the white balance using the dropper tool, however, this isn’t always accurate and it’s worth further adjusting this to what looks right and natural.
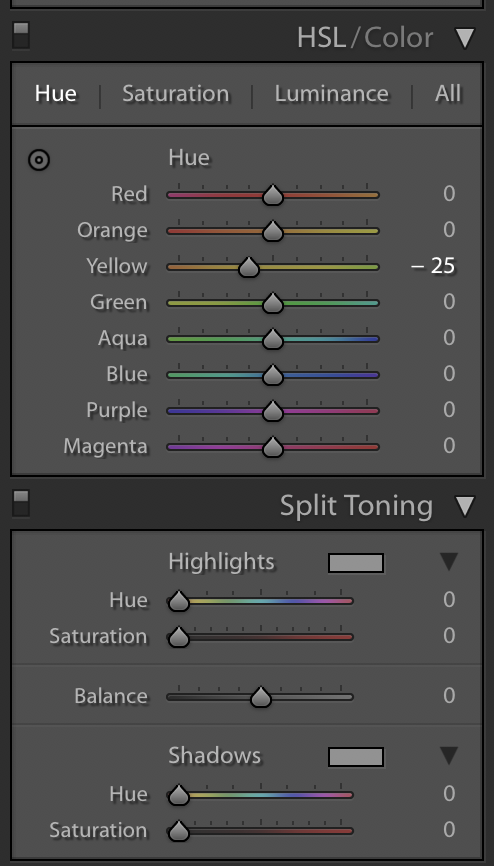
Colour grading then allows you to add a more stylised look. The Split Toning tools and Hue/ Saturation sliders allow you to target specific colours rather than adjusting the temperature of the overall image. This can provide more natural & subtle effects. Split toning allows you to adjust the tone of the shadows and highlights, whereas the Hue/ Saturation tool targets and distorts individual colours in an image.
It’s worth being careful of colour grading when dealing with branded content, as distorting colours can create a difference between the image and the real-life product. This is particularly important for products, like clothing or cosmetics, where colour is a key factor in people’s purchasing decisions.
Presets
Presets are another well-known feature of Lightroom. Even if you’re familiar with all the manual editing tools, presets are useful for editing quickly or if you’re after a stylised look. They often use Split Toning and Hue/Saturation distortion extensively to achieve a specific colour grade. There are extensive free and paid preset packs available online. Popular influencers, photographers & content creators often sell the presets they use to achieve their signature style. Presets are also a great way to learn more about Lightroom, as they adjust the settings and demonstrate how specific styles are achieved.
These are just a few of the many tools Lightroom offers. We love using Lightroom at Milkbar in our content creation strategy to achieve polished & consistent social content!
Why Use Lightroom in your Social Media Strategy?
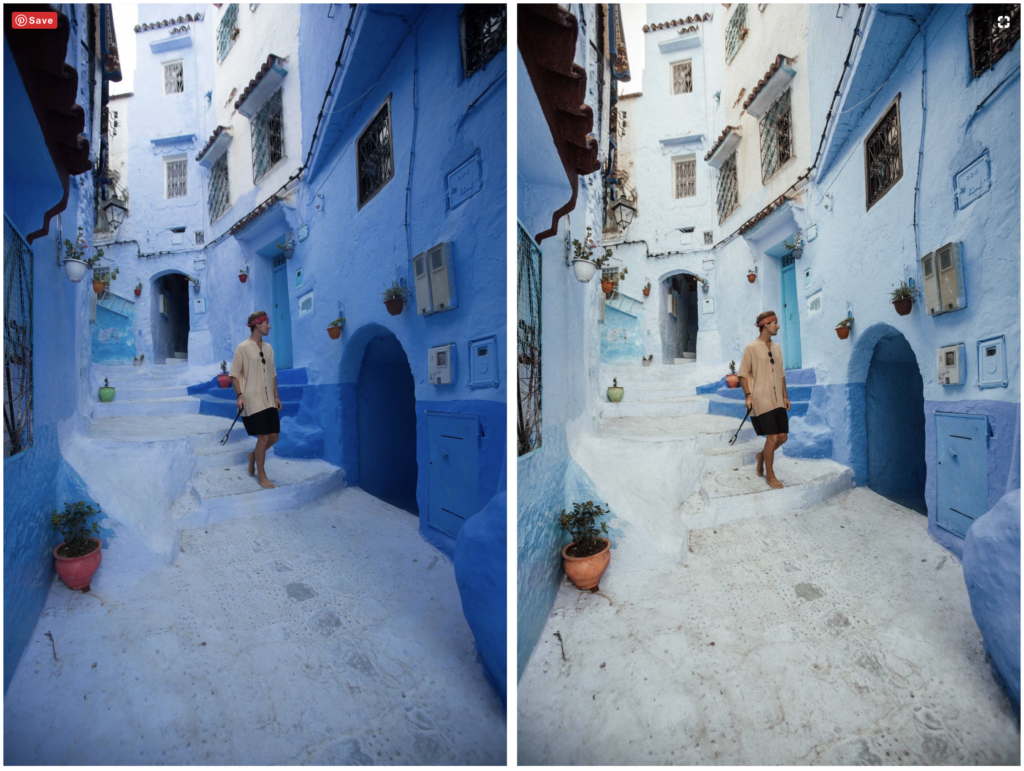
- Elevate your content. Have you ever taken a photo and found that the colours & vibrance of the image didn’t translate in camera? Lightroom is a great way to bring back the depth and quality of your image. Even just simple tweaks can take your images to the next level.
- Establish a consistent aesthetic. Lightroom is one of the best ways to develop a cohesive feed aesthetic, as it allows you to customise images and develop a clear style. This can be achieved by using presets or manually colour grading. These stylised choices can maximise branding on social media by using tones & colours that complement your brand messaging. Lightroom can apply these settings to multiple images, so that an entire album matches.
- Time Saving. These bulk editing capabilities save time when editing multiple photos. Rather than editing every image separately, you can copy settings across to quickly achieve consistency.
Lightroom is an incredible tool for any content creator. Try it today & get familiar with the different settings & adjustments. It’s a fun & creative way to add a signature style to your content and create some super polished social content!

Katy is a Social Media Coordinator at Milkbar Digital. She loves taking photos and creating aesthetic & engaging visual content. When she’s not at work, you’ll find her at gigs and festivals or planning future travels.
Looking for a way to up your social media, but not sure what needs doing? Milkbar Digital is a Melbourne social media and digital marketing agency here to help business small and large. If you need help with your social media or don’t know where to begin, get in touch!
No comments